Next project.

7 tons of pea stone gravel.
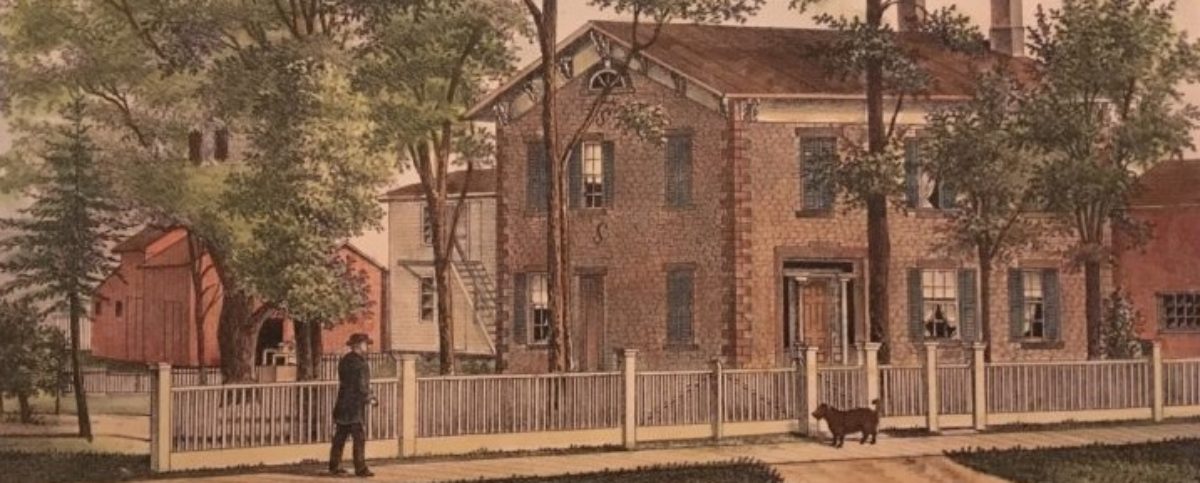
Restoring the Captain Throop house
New care takers of an 1832 cobblestone in Pultneyville New York.
Next project.
7 tons of pea stone gravel.
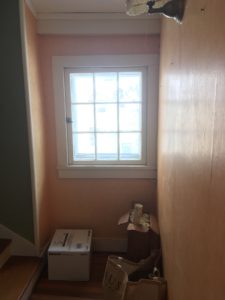
 The living room looks great now. The walls are painted, the windows and trim are painted, the electric is upgraded (at least some of it) and the fireplace works. The one part that doesn’t look finished is actually the most interesting part.
First, a look back at where we started. The floors were dirty and the walls were pink – even a pink ceiling. This picture is from our first tour of the house before we bought it.

I think the first trip over after we purchased the house included two beach chairs for furniture.
Toni experimented with a few color choices, leaving patches of paint up to see how they looked in different light.
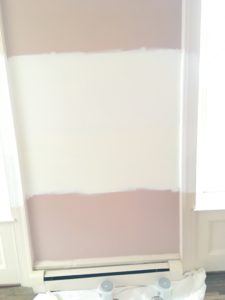
Once decided, it still took days of detailed painting work. There is a lot of trim in that room!
There are a few minor details still to be finished, like new glass for the wall sconces and a better radiator cover behind the couch, but it’s looking good.
One part that won’t be changing is in this next picture, where you can see three holes in the ceiling. The far left one in the corner is electric; we think it’s connected to a switch on the wall and may someday be used again. The other two are corks in the ceiling.

At first, I thought they might be old gas pipes for lighting, but they’re not pipes. They’re bottles – upside down in the ceiling and corked up.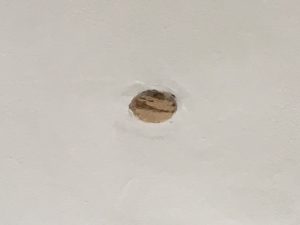
The previous owner said they were witch’s bottles, but we had never heard of such a thing.
Another explanation was a fire extinguisher, along the lines of a shur-stop fire “bomb”.  These were filled with salt water or with a highly toxic chemical that would help snuff out the fire. In reading about them, I found instructions for museums on how to dispose of them safely since they were too dangerous to display. Not what we wanted in our ceiling. But these weren’t sealed bottles. They just had a cork, so that didn’t seem likely.
Today I happened across an article in Archeology that seems to confirm the idea of witch’s bottles. It sounds like they’re not common in the United States, but were sometimes found in England. Buried in the foundation or hidden in the house, sometimes upside down and sometimes filled with the owner’s urine. Being upside down and with a dry split cork, that last part doesn’t seem to apply in our case, but the rest of the story seems to fit.
Another article described them not for capturing the spirit of someone that died in the home, but rather to protect the home from evil spirits.
Maybe that’s why the room feels so happy now.
The neighbors want to put up a new fence, so I removed the part of our old split rail fence that goes along their property. But there was one other thing that had to come down before they put up the fence and made it harder.
First, it was nice of the neighbor to check. It wasn’t clear from the survey exactly who the fence belonged to, since it meandered across the property line a bit, but we have the same style on the other side of the yard so was clearly ours at one time.

Next to it was what I can only think was a clothes line post. But what a post – two 2″ iron pipes anchored in a lot of concrete. Each concrete footer was at least a foot across and I stopped chipping away with the sledge hammer after getting down more than a half foot under ground.
In the end, a sawzall saved the day. I dug out enough to get the saw level under ground and cut each pole off. The rest of the footing is now buried. Someday, we may want to look back at these pictures and see exactly where. 
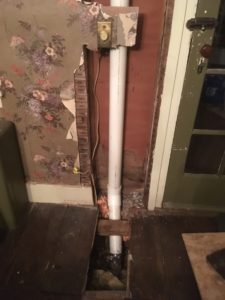
We’re well past week seven, but it looks like there’s at least one more leak I didn’t talk about yet. That’s the little plumbing leak in the dining room.
It wasn’t actually leaking in the dining room. That would have been too easy. It was leaking inside the wall and flowing *under* the dining room. For quite some time apparently. We opened the wall up before Christmas and it took until just a couple weeks ago to finally get it repaired. 
 The plumbers were going to have to go on the metal roof to fix it, and they wanted to wait until the snow melted. Go figure. It just hasn’t been easy to find a couple days this winter when they could work on it.
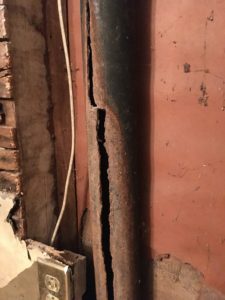
Inside the wall, the cast iron pipe had split. In some cases, that can happen as they get old. In this case, though, even a little water from the upstairs bath would leak out of the pipe. But if it was a vertical pipe with a split, it seemed like more water than I would have expected.
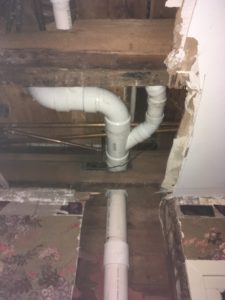
When the plumbers were finally able to get here and had the pipes opened up, I asked them to check the line below the dining room. It was clogged. The plumber was not able to clear the pipe. They put almost 100′ of snake in to it, but still the water wouldn’t flow. Since it’s the smallest of “crawl” spaces (only a few inches between beams and dirt), that seemed like a potential risk for major upheaval if that had to be dug up.
We called in a different plumber and they were able to get it opened up, and water flowing. The first plumbers came back shortly after and finished the work. We now have new PVC piping in the upstairs bath – and a working upstairs bathroom. Something we haven’t had since before Christmas! Cheers all around!
It’s still an open wall in the dining room and a patch of rotted floor that needs to be replaced. That’s right up there on the list… but not top of the list, unfortunately. Right now, we’re waiting on estimates for replacing the soffits under the new roof. They are rotted away and birds have been flying in to the attic. I patched it temporarily, but that’s top of the list. Then comes the wall in the kitchen.
I haven’t talked about the wall in the kitchen yet? Hard to keep up…
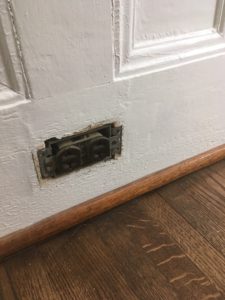
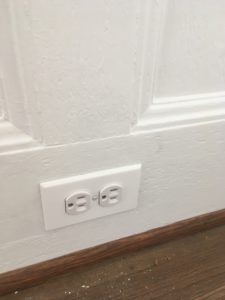
Grounded outlets, now available in the living room!
With the trim painted, the old brown outlets stood out. They were also two prong un-grounded outlets with old cloth wiring into the wall. Like a lot of other wiring in the house, the wiring from the panel box was updated but the branch circuits were mostly left in place.
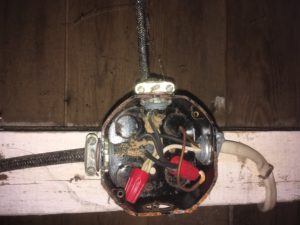 I was surprised to find that the cloth-covered wiring did have a ground wire in it. Those are the black cables in the picture, and the ground wire is tied to the junction box. That box was probably grounded in the same way when it was originally wired. Unfortunately, the “updated” wiring from the panel box didn’t do that. They just left the ground wire loose.
That’s now been updated, so we have our first new circuits! Right in the reading corner of the living room too, so it’ll make a nice place to plug in the electric blanket next time it gets down to zero degrees.
Let’s hope that’s not for a while – we just opened up a new hole in the kitchen wall to check on a beam…
An update from on top of the house.
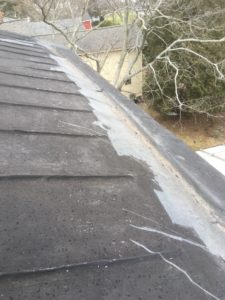
First, an image of the yankee gutter, the internal gutter system that involves cutting in to the rafters to make an indentation for the water. It’s an interesting idea, but if there are any leaks at all you don’t get leaky gutters – you get a leaky roof.
Once the old metal was taken off, all the rafter tails under the yankee gutter had to be sistered with new wood.
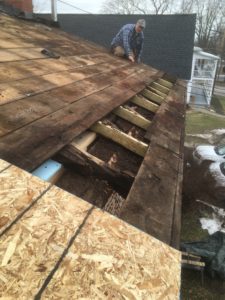
Except for that, the boards were in good shape. From inside the attic, with no sheeting on yet:

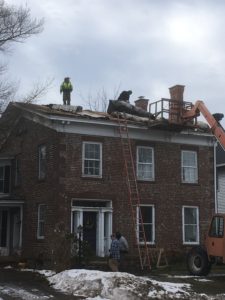
From across the street. They had to cut up the rolls of sheet metal to get it off the roof and into the dumpster.
Work continues…
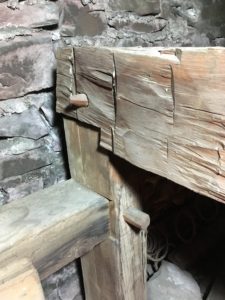
Always new clues. What we think we know about the house constantly changes, and this back wall of the house may show a few layers: 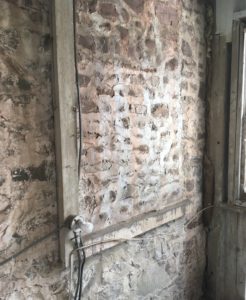
First, it took us a while to notice the obvious clue: there used to be a window there. This is the back wall of the cobblestone house, in what is currently the stairway to the basement. The stairs go outside the house and in through a doorway in the basement wall. You can see the view out through that door in http://captainthroop.org/week-1-leak-1/.
The vertical structure with the light on it is just wood. What we didn’t notice right away was the horizontal structure near it. That’s stone. The same stone that’s under all our other windows. At some point, there must have been a window there, which was covered over with more stone somewhere along the way.
What struck me the other day as I looked out the kitchen window was the stairway above a neighbor’s garage shown here:
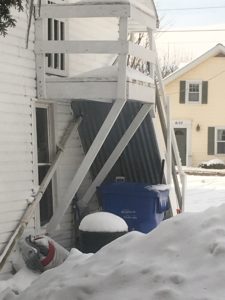
The slope of the stairs up to the second floor… I’d seen that slope before on the same back wall:
If that image is oriented correctly on this post, you’ll see a tip of a yellow broom handle in the bottom left corner. From the top left there is a hint of a sloping line down and to the right. In the first picture with the window sill, you’ll see it continues down to what is essentially a continuation of the foundation wall out away from the house.
That could easily have been a stairway up. But where to?
Up to the little dead end hallway upstairs maybe? The indoor image is down the upstairs hall that goes along the back wall of the cobblestone part of the house, which is up the steps to the left. The window is directly above our current basement door, so could have easily been a door in to the second floor. But how was it laid out from there?
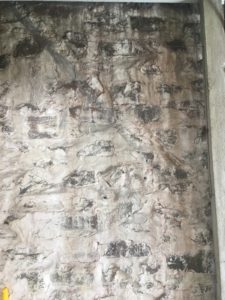
There was an empty spot in our entry way. The house had, through many owners, always had a few key items from Capt. Throop. Unfortunately, they did not survive the previous owner, and we ended up with a house with holes. Literal holes – empty spaces, like the missing wall paper in the entry way:
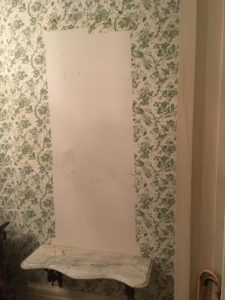
There are other holes too. An empty hook for a portrait above the fireplace, a missing sculpture of the captain’s dog, and a desk that’s gone.
However, there is good news on one item: the mirror has returned!
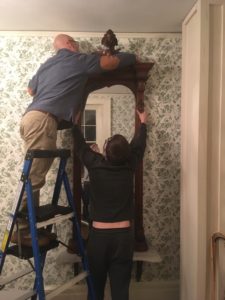
We found out neighbors had purchased it to keep the history in Pultneyville, and we’re happy they felt comfortable entrusting us to put things back as they should be.
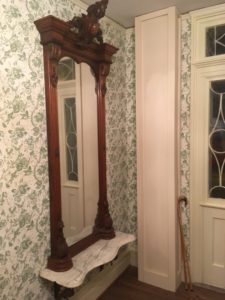
And now they are – in the entry way, at least.
Enough of the sunrise and muffins. Up to the attic!
There were water stains in two of the upstairs rooms when we first saw the house, but they got a lot worse after a heavy rain. My guess is that the cobblestone part of the house has a hundred-year metal roof on it, but that it’s 150 years old. It’s been covered in a rubberized coating, but that’s leaking too.

I have buckets and plastic catching the snow melt for now – a new roof is ordered but we’re still waiting for the materials to arrive. Not much call for roofing in the winter, so it appears to be slow in shipping.
You may notice the new wood in that photo. That’s because that was the worst of the rot, and we had to have it replaced. We contracted with Randy Cornelius for the repairs, and in these pictures you can see the temporary brace that was needed and some of the rotten wood that was pulled out of the corner.
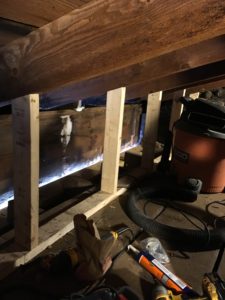
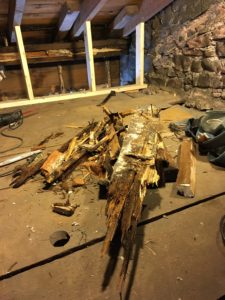
Fortunately, it was just the one corner, and the rest of the structure appears dry and solid:
The one other thing that’s interesting in the picture with the rotted wood on the floor – on the rock wall by the brace there is a trace of an old slope. It’s hard to tell, but that looks to me like an old roof line. It also happens to line up with the top of the beam in the last picture, which would explain its placement. It’s certainly possible the roof was raised from its original placement. But it must have been done before that Wayne County History of 1877. Somewhere between having it built in 1832 and the drawing from 1877, Capt. Throop must have decided to update the look of the place.
Those hinges I ordered did the trick! The oven stays closed and heats up properly now. The proof is in the muffins.